
| Legal Information |
|

The following describes how to configure Small Business Server (SBS) 2000 in a scenario where the server uses a modem or terminal device such as an Integrated Services Digital Network (ISDN) device to connect to the Internet. This article may help you resolve some of the following issues:
If a server uses a modem or terminal device to connect to the Internet, the DNS server is the pivotal point for Active Directory and Local Area Network (LAN) connectivity. Active Directory client computers (including the server and its services) use DNS to locate domain controllers for administration and logon procedures. For Active Directory clients and servers to function correctly, you must have a DNS server installed and configured with the appropriate DNS zone information.
If only one adapter is used to connect to the Internet, through a router for example, there is a different procedure. There is a further procedure for servers using two adapters.
A dial-up connection is established using Dial-up Networking or Remote Access Services (RAS). The hardware used for a dial-up connection is typically an analog modem or an ISDN terminal adapter. These devices must be configured through the Modems page of Control Panel. They may be connected to Small Business Server through a serial port or a multiport serial board, or they may be internal.
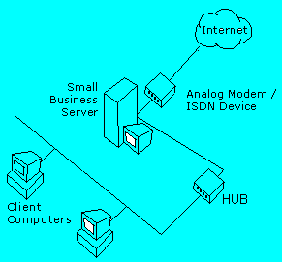
Dial-up Configuration. A server running Small Business Server is connected to the LAN through a network adapter and to the ISP through a modem/terminal adapter. This dial-up device could be an internal card or an external device connected through a serial port or serial board.
The Internet Connection Wizard in SBS is designed to help you configure Windows 2000 networking through LAN connections or remote dial-up connections, Exchange 2000 Server, and Internet Security and Acceleration (ISA) Server 2000.
In an ISA environment it is also worth reviewing how to configure SBS/BackOffice 2000 and Exchange Server with ISA
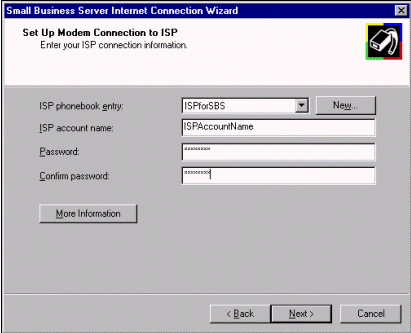
For a modem connection, or any dial-up connection that uses a phonebook entry to dial, you will need the following information from your Internet service provider (ISP):
IP Address: 192.168.16.2
Subnet Mask: 255.255.255.0
Default Gateway:
Preferred DNS server: 192.168.16.2NOTE: The preferred DNS server uses the IP address of the network adapter.
Alternate DNS server: blank
Before starting, you may wish to inspect the flow-chart associated with the ICW procedure.
The Small Business Server Internet Connection Wizard (ICW) can be started from the Small Business Server Console in a couple of ways.
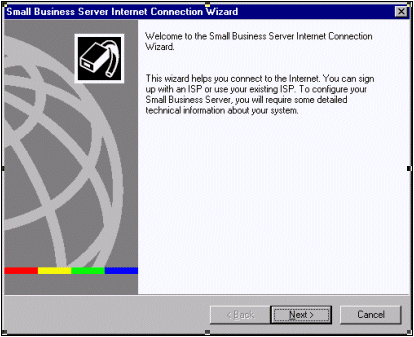
In some cases these ISPs provide an online sign-up that configures the appropriate Small Business Server services. By selecting Select an ISP for a new Internet account, you launch the Internet Connection Wizard. The ICW then dials the Microsoft Referral Server and downloads a list of ISPs that have special offerings for Small Business Server customers. Therefore, in order to take advantage of this feature, you must have a functional modem on your server.
If it supports online sign-up, once your new ISP has received your user, system, and billing information, the sign-up server generates an .ins file that is downloaded to your server. This .ins file will configure your dial-up networking connection, Proxy Server, Microsoft Exchange Server, and the information required by the Web Publishing Wizard. Some ISPs distribute sign-up floppy disks. If your ISP does this and is configured specifically for Small Business Server, you will not need to use the Small Business Server Internet Connection Wizard. Follow the instructions included with the sign-up disk to continue the installation.
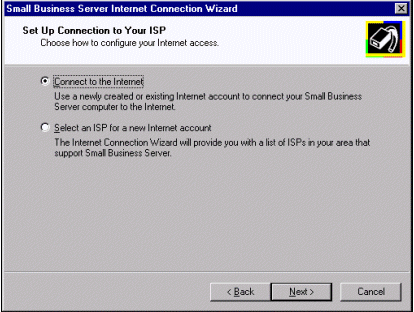
Select Modem or terminal adapter whenever the hardware on the server is detected by the Windows NT operating system as a modem and can be accessed through dial-up networking and the Remote Access Service. This includes analog modems and ISDN terminal adapters.
Before beginning with the Internet Connection Wizard, these devices should be installed through the Modems area of Control Panel and be configured as ports through the Remote Access Service with dial-out access.
Client systems use the POP3 protocol to retrieve e-mail stored on a server. In the Small Business Server environment, Proxy Server manages the connection to the ISP, preventing outsiders from reaching the LAN and optionally preventing LAN users from reaching the Internet.
When you create user accounts for Small Business Server, you also configure the users' computers. If your users need access to POP3 e-mail accounts on the ISP's e-mail server, you need to configure their machines accordingly. Give those users' computers the WinSock Proxy client software so they can reach the Proxy Server, and add Internet Mail manually to each of those users' profiles in the Microsoft Outlook(r) messaging and collaboration client.
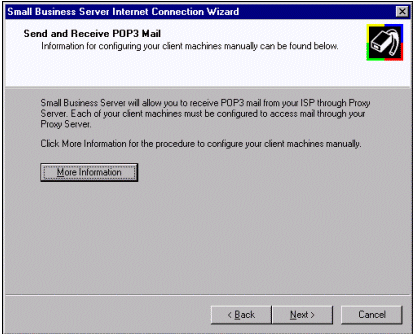
NOTE: If you want to configure POP3 in the Internet Connection Wizard, click More Information in the Internet Connection Wizard to refer to the additional help provided by the wizard.
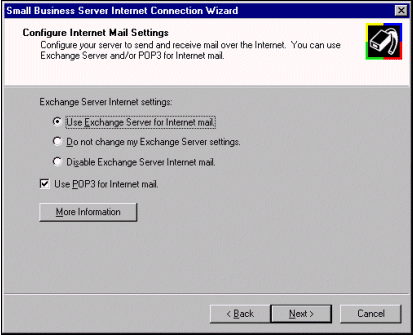
The Configure Internet Mail Settings page configures Small Business Server to use Internet e-mail. If you are using SMTP e-mail through Exchange Server, select the Use
Exchange Server for Internet mail option, which activates the Microsoft Exchange Internet Mail Service in Small Business Server. This is the option to choose, whether you host your own Internet domain and SMTP mail through a full-time connection or you dial in to an ISP that queues your mail until you connect.
Selecting Disable Exchange Server Internet Mail will disable the Microsoft Exchange Server Internet Mail Service. This option disables only Internet mail through Exchange Server; it does not affect the ability to send mail to others on the local Small Business Server-based network. If you have already configured or customized your Exchange Server settings and do not wish to override these settings, select Do not change my Exchange Server settings.
If you will be retrieving e-mail from POP3 mailboxes at your ISP instead of directly through SMTP, select the Use POP3 for Internet mail option.
If in the Configure Internet Mail Settings page you select the option Use Exchange Server for Internet mail, the wizard presents the Configure SMTP Mail Delivery page. This page will allow you to configure the sending properties of the Microsoft Exchange Internet Mail Service. The choices available to you depend on the connection typ, e: for a demand-dial router connection or a dial-up connection, select the Forward all mail to host option.
If you do not have a full-time connection to the Internet, you should select Forward all mail to host, which covers dial-up connections, dial-on-demand routers, or any connection that does not maintain a full-time Internet connection. This option will set the Internet Mail Service to forward all messages to an SMTP relay host provided by your ISP. This relay host can be entered by its IP address or fully qualified domain name (for example, exchange1.isp.com or 192.168.16.1). If a dial-up connection is established through this wizard, the option to use DNS is unavailable.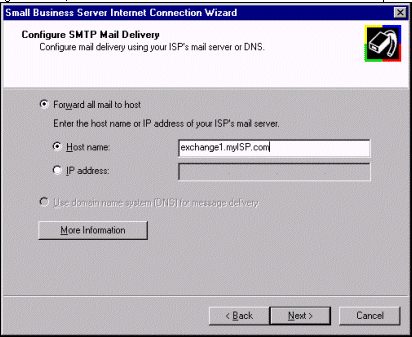
NOTE: Some ISPs may require you to forward all outbound messages to one of their e-mail servers for delivery. In this case, click Forward all mail to hosts, type the IP address of the ISP relay server, and then click Next. A Domain Name needs to be configured as well.
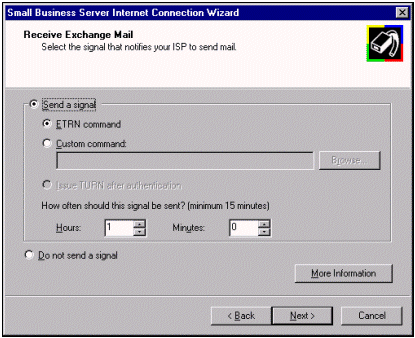
NOTE: You may need to enable message dequeuing for mail retrieval depending on the mail retrieval method that you use. It is recommended that you discuss this issue with your ISP to ensure compatibility.
For more details on receiving mail, click here.
To prevent download failures due to improper POP3 configuration, configure your SBS server for DNS by performing the following steps. If you have a dial-up connection, use the following steps to configure DNS for your server:
Some IPs dynamically assign a DNS server entry to dial-up clients. Contact your ISP to determine the appropriate setting for your network.
Click OK to close each dialog box.NOTE: The My Web Server and My Web-based Mail Server options are dimmed for a dial-up configuration.
To help with client connectivity, you may have to modify the DHCP scope for your local network. The following configuration is recommended for the DHCP scope; this configuration works in a majority of configurations. This example assumes that you are using the default setting that is provided with the SBS installation.
server.domain.local[192.168.16.2]
Scope[192.168.16.0]
Scope Options
| Option | Name | Vendor | Value |
| 003 | Router | Standard | 192.168.16.2 |
| 006 | DNS Servers | Standard | 192.168.16.2 |
| 044 | WINS/NBNS Servers | Standard | 192.168.16.2 |
| 046 | WINS/NBT Node Type | Standard | 0x1 |
| Search Knowledge Base | Feedback |