
| Legal Information |
|

The following provides configuration information for Small Business Server 2000 or BackOffice Server 2000 that is configured with Microsoft Exchange 2000 and Internet Security and Acceleration (ISA) Server on a single computer that is also a domain controller (DC).
This applies to configurations where the server has two network adapters, one for the internal LAN, and the other adapter that is connected to a full-time Internet connection, such as DSL, a cable modem, T1 line, and so on.
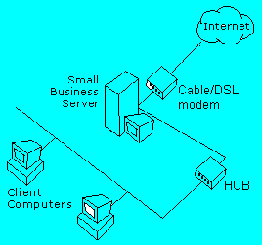
In these installations, the Domain Name System (DNS) server is the pivotal point for Active Directory (AD) and LAN connectivity. DNS is the AD locator in Windows 2000. AD clients (including the server and its services) use DNS to locate domain controllers for administration and logon. You must have a DNS server installed and correctly configured for AD and the associated client software to function correctly.
The Internet Connection Wizard (ICW) is a tool that is designed to help with the configuration of Windows 2000 networking through LAN connections or remote dial-up, Exchange Server 2000 and the ISA Server.
It is also necessary to gather certain configuration information before using the ICW.
For the purpose of these steps, the IP addresses that are used to connect to the Internet are provided here. Note that these values will be provided to you by your ISP or from your firewall/router if you are using these devices.The following steps are for configuring server internal and external connectivity:
Use the following IP Address
IP Address: 192.168.16.2
Subnet Mask: 255.255.255.0
Default Gateway: blank
Use the following DNS server addresses:Preferred DNS server: 192.168.16.2
Alternate DNS server: blank
Use the following IP address
IP Address: static address provided by ISP
Subnet Mask: static address provided by ISP
Default Gateway: static address provided by ISP AND
Use the following DNS server addresses:Preferred DNS server: 192.168.16.2
Alternate DNS server: blank
NOTE: While possible to achieve similar results with only one NIC, it is not advisable because of the inherent security risk to your internal network. This is also not a supported configuration, as far as Proxy Server is concerned.
After adding the second NIC along with the appropriate drivers.
NOTE: This assumes the default IP address of 10.0.0.2 is being used. If the default IP address has been changed, verify the procedure by following information in the following Microsoft Knowledge Base article: 194562 Change the Default IP Address in Small Business Server Verify that the external NIC address does not show up in the ISA Manager's Local address Table (LAT). If the NIC address does, remove it. Important: Use the IP address from the internal network adapter for the preferred DNS server on the external Local Area Connection. Do not use DNS that is provided by an ISP, and do not select the Obtain DNS server address automatically option.
Before starting, you may wish to inspect the flow-chart associated with the ICW procedure.
The Small Business Server Internet Connection Wizard (ICW) can be started from the Small Business Server Console in a couple of ways.
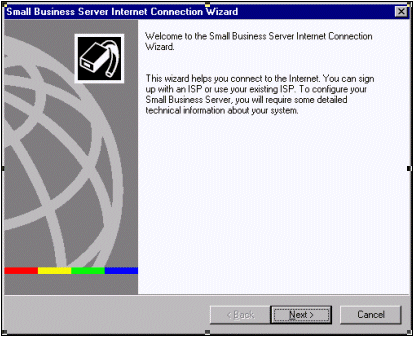
In some cases these ISPs provide an online sign-up that configures the appropriate Small Business Server services. By selecting Select an ISP for a new Internet account, you launch the Internet Connection Wizard. The ICW then dials the Microsoft Referral Server and downloads a list of ISPs that have special offerings for Small Business Server customers. Therefore, in order to take advantage of this feature, you must have a functional modem on your server.
If it supports online sign-up, once your new ISP has received your user, system, and billing information, the sign-up server generates an .ins file that is downloaded to your server. This .ins file will configure your dial-up networking connection, Proxy Server, Microsoft Exchange Server, and the information required by the Web Publishing Wizard. Some ISPs distribute sign-up floppy disks. If your ISP does this and is configured specifically for Small Business Server, you will not need to use the Small Business Server Internet Connection Wizard. Follow the instructions included with the sign-up disk to continue the installation.
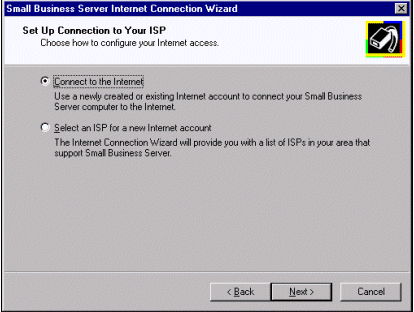
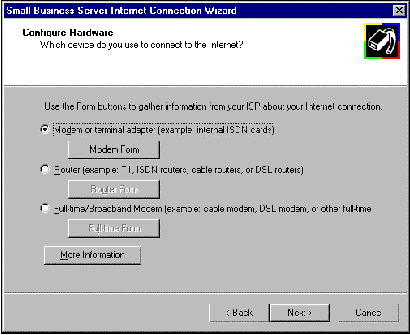
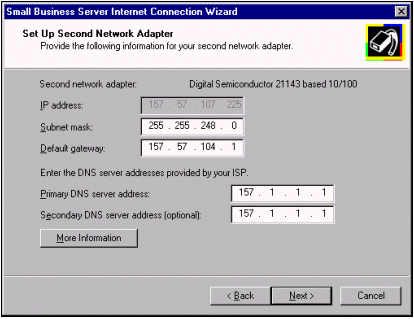
The Full-time/Broadband Modem selection is designed for all connection methods that provide a full-time, high-speed connection to your ISP through a second network adapter. This connection is separate from the network adapter attached to the local network. These full-time connections include ADSL modems, cable modems, and the access to these devices through second network adapters. All of this hardware must be configured before proceeding with this wizard. Also, you will need to configure the second (external) network adapter with a static IP address before continuing with the wizard. Small Business Server installs the DHCP server by default, and Windows NT (which is part of BackOffice Small Business Server) does not currently support using the DHCP server and the DHCP client on the same computer.
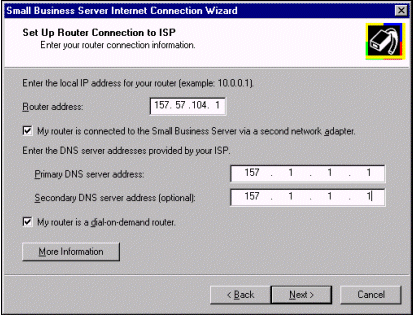
If you are going to configure Small Business Server to be the gateway to the Internet for the client machines, you will need to check the option My router is connected to the Small Business Server via a second network adapter. This option allows you to configure Small Business Server as a firewall.
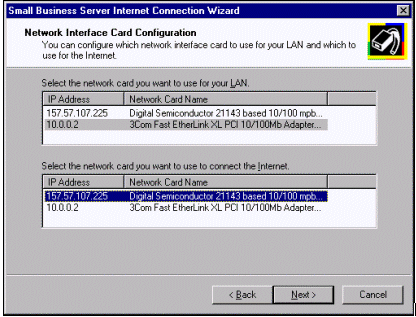
The Network Interface Card Configuration page is presented when Small Business Server is configured as the gateway for the local network. This page presents the network adapters in two windows. In the first window, you identify the internal network adapter that will be used for the local network. This internal adapter should be manually configured in the Local Address Table (LAT) in the Proxy Server configuration, using the Microsoft Management Console. In the second window, select the external network adapter that will be used to connect to the Internet.
If you have more than one network adapter or have changed your IP address from the default address of 10.0.0.2, you will want to confirm the LAT configuration in Proxy Server.
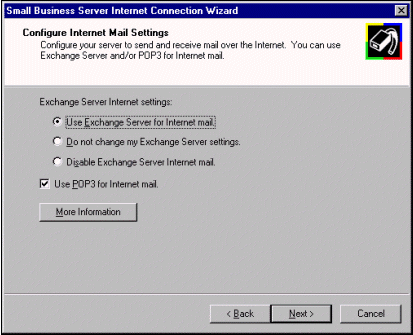
The Configure Internet Mail Settings page configures Small Business Server to use Internet e-mail. If you are using SMTP e-mail through Exchange Server, select the Use
Exchange Server for Internet mail option, which activates the Microsoft Exchange Internet Mail Service in Small Business Server. This is the option to choose, whether you host your own Internet domain and SMTP mail through a full-time connection or you dial in to an ISP that queues your mail until you connect.
Selecting Disable Exchange Server Internet Mail will disable the Microsoft Exchange Server Internet Mail Service. This option disables only Internet mail through Exchange Server; it does not affect the ability to send mail to others on the local Small Business Server-based network.
If you have already configured or customized your Exchange Server settings and do not wish to override these settings, select Do not change my Exchange Server settings.
If you will be retrieving e-mail from POP3 mailboxes at your ISP instead of directly through SMTP, select the Use POP3 for Internet mail option.
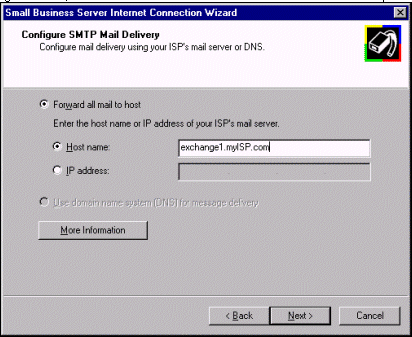
If in the Configure Internet Mail Settings page you select the option Use Exchange Server for Internet mail, the wizard presents the Configure SMTP Mail Delivery page. This page will allow you to configure the sending properties of the Microsoft Exchange Internet Mail Service. The choices available to you depend on the connection type,
for a full-time connection (via router or broadband device), select the Use domain name system (DNS) for message delivery option.
With a full-time Internet connection using Exchange Server for your Internet mail, you should select Use domain name system (DNS) for message delivery. This option will use DNS queries to resolve any Internet e-mail addresses for delivery; thus the connection must be established before mail is sent.
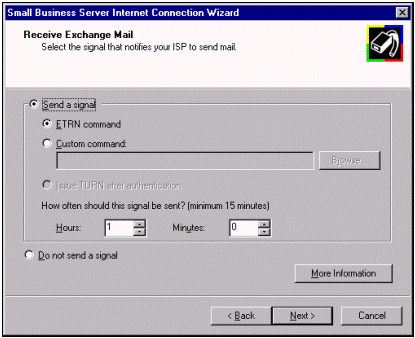
For more details on receiving mail, click here.
Also check the configuration issues that can arise with POP3 and dsl.server.domain.local[192.168.16.2]
Scope[192.168.16.0]
SBS Scope
Scope Options
You should see the following entries:
Option Name Vendor Value 003 Router Standard 192.168.16.2 006 DNS Servers Standard 192.168.16.2 044 WINS/NBNS Servers Standard 192.168.16.2 046 WINS/NBT Node Type Standard 0x8
| Search Knowledge Base | Feedback |