| Legal Information |
|

The mailbox store and public folder store data contained within your Exchange 2000 databases and transaction log files are the most important data to back up in your Exchange 2000 organisation. You can use an Exchange 2000 database backup to restore damaged mailbox or public folder stores to a functioning server running Exchange 2000. You can also use Exchange 2000 database backups to restore your Exchange 2000 databases to an alternate server.
For more information about how to restore Exchange 2000 databases to an alternate server, see Restoring Exchange 2000 Databases to an Alternate Server.
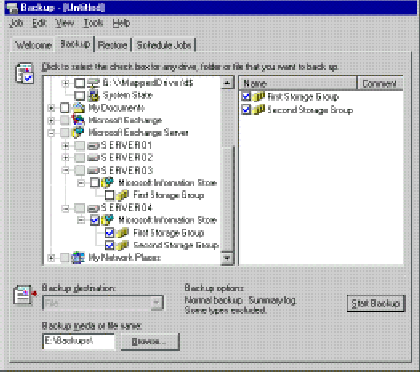
Exchange 2000 uses the Microsoft Information Store options in Backup to back up Exchange 2000 databases and their associated transaction log files. To manage this process, Backup makes API calls to the Exchange 2000 Extensible Storage Engine (ESE). Exchange 2000 informs ESE that it is entering a backup mode, and then, assuming the backup is a Normal backup, a patch file is generated for each database.
If the backup is a Differential or Incremental backup, a patch file is not generated because Differential and Incremental backups only back up transaction logs. When ESE enters a backup mode, a new log file opens. For example, if Edb.log is the current open log file, Edb.log is closed and renamed to the latest generation, and a new Edb.log is opened. After the backup is complete, the new Edb.log file designates the point when the ESE can truncate the logs.
When the backup begins, Backup requests that the database read and sequence the database pages from ESE. The pages are read in numeric sequence in groups of 16, 4-KB pages (though the actual size can vary). As the database engine reads the pages, the ESE verifies them through a checksum to ensure that they are valid.
If they are invalid, the backup stops to prevent the storage of damaged data. After the backup is complete and all the pages are read, the backup copies the logs and patch files to the backup set. The log files are then truncated or deleted at the point when the new generation started. The backup set closes, the ESE enters normal mode, and the backup is complete.
The following figure illustrates the Exchange 2000 backup process.

For information about backup types and rotations to use when backing up Exchange 2000 databases, see Selecting Backup Types and Rotation Schedules.
To back up Exchange 2000 databasesThis is an online process making use of the online backup application programming interfaces (APIs). There is also an offline backup procedure.

The information in this article applies to:
| Search Knowledge Base | Feedback |