Reinstalling Exchange 2000 and any relevant service packs and hotfixes helps ensure that all Exchange 2000 files are intact and are the correct version. Reinstalling Exchange 2000 and any service packs stops Exchange services from running on the Exchange server during the install processes; therefore, users cannot access the Exchange server until after the installations are complete.
Note If you attempt to repair a server running Exchange 2000 in an Exchange 2000 cluster, you must take that server offline before running Exchange 2000 Setup in Reinstall mode. You take a server offline by stopping the Cluster service on the server you want to repair.
To stop the Cluster service,
- Click Start,
- Point to Programs, point to Administrative Tools, and then click Services.
- In Services, double-click Cluster Service, and then click Stop.
When the Cluster service has stopped successfully, click OK. Setup does not allow you to proceed until the node is offline.
To reinstall Exchange 2000
- Insert the Exchange 2000 Installation CD, and then click Exchange Server Setup.
- In Microsoft Exchange 2000 Installation Wizard, on the Welcome page, click Next.
- On the Component Selection page, under Action, select the Reinstall option next to each component name that is installed on your server running Exchange, and then click Next. Components that are not installed are not available.

The Component Selection page of Microsoft Exchange 2000 Installation Wizard
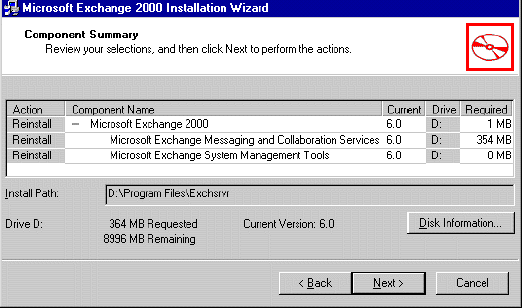
- On the Component Summary page, click Next to begin the reinstall process.

The Component Summary page
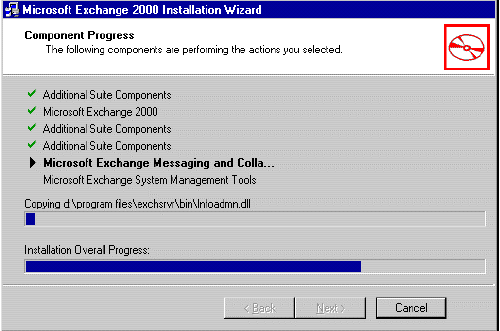
- As the reinstall process is in progress, view the Component Progress page. Exchange 2000 stops all Exchange services and performs all the necessary steps to reinstall Exchange 2000 over the damaged installation, including recopying all files.

The Component Progress page
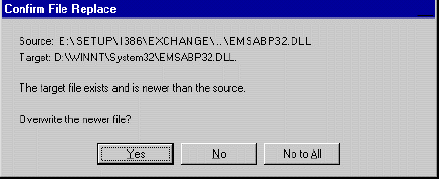
- As Setup attempts to copy installation files to your computer, the Confirm File Replace dialog box may appear, asking if you want to overwrite certain files on your computer that are newer than the files being copied from the Exchange 2000 Setup CD. Because you are attempting to repair files that are either damaged or the wrong version, you should click Yes to overwrite these files. You can restore the newer versions of these overwritten files in the repair process when you install the Exchange 2000 service packs or hotfixes that were installed on the server prior to the repair process.

The Confirm File Replace dialog box
- After Exchange 2000 Setup is complete, Setup notifies you if there are errors and whether your installation of Exchange 2000 is successful.
- Click Finish to exit Setup.
- Install any Exchange 2000 service packs and hotfixes that were installed to the server prior to the repair process.
The information in this article applies to:
- Microsoft Exchange Server 2003 Enterprise Edition
- Microsoft Exchange Server 2003 Standard Edition
- Microsoft Windows Small Business Server 2003, Premium Edition
- Microsoft Windows Small Business Server 2003, Standard Edition
- Microsoft Exchange 2000 Server


