You can upgrade a laptop hard drive in one of two ways:
- Clone your old drive to the new one using 2.5- to 3.5-inch drive adapters connected to your desktop PC's IDE ports or
- take the easy way out and buy an upgrade kit, which has everything you need to switch.
Assuming the latter option and upgrade to a 7,200 rpm 60 GB hard drive.
- Prep your laptop for surgery
- Before you start, make sure your laptop is configured to boot from the optical drive before the hard drive. Your manual should tell you where to find this option in your system BIOS.
- Place the data-transfer software CD in the laptop's optical drive.
- Move your data
- Run power to the new drive with the included AC adapter and, with the laptop off, plug the drive into your laptop with a USB cable.
- Power up the laptop; it should boot the data-transfer software and load a clone utility.
- Follow the instructions to clone your the hard drive to the external drive.
- Swap out the old drive
- The kit's instructions will describe how to open the enclosure and remove the newly populated hard drive. Once it's out, locate the hard drive bay in the laptop's belly (on the M6000N, with the front facing you, it's on the right).
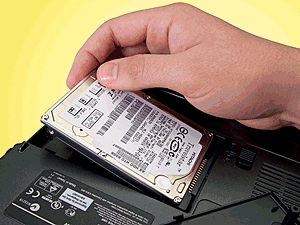
- Take out the screws securing the cover panel. To remove the M6000N's drive, slide it away from its pins and gently lift it from its compartment.
- Remove the four screws on the sides of the drive's carrier, then swap the new drive into the carrier.
- Position the carrier in the drive bay and gently push the drive toward its connector until its pins are completely secured. Replace the bay cover, and you're back in business.
Tip:
Don't throw away that old drive. You can put it into the new drive's old enclosure and use it as an external drive for additional storage or backup.

Screw your new drive into the old drive's carrier, position the drive in the bay, and secure its pins to the drive's connector.


